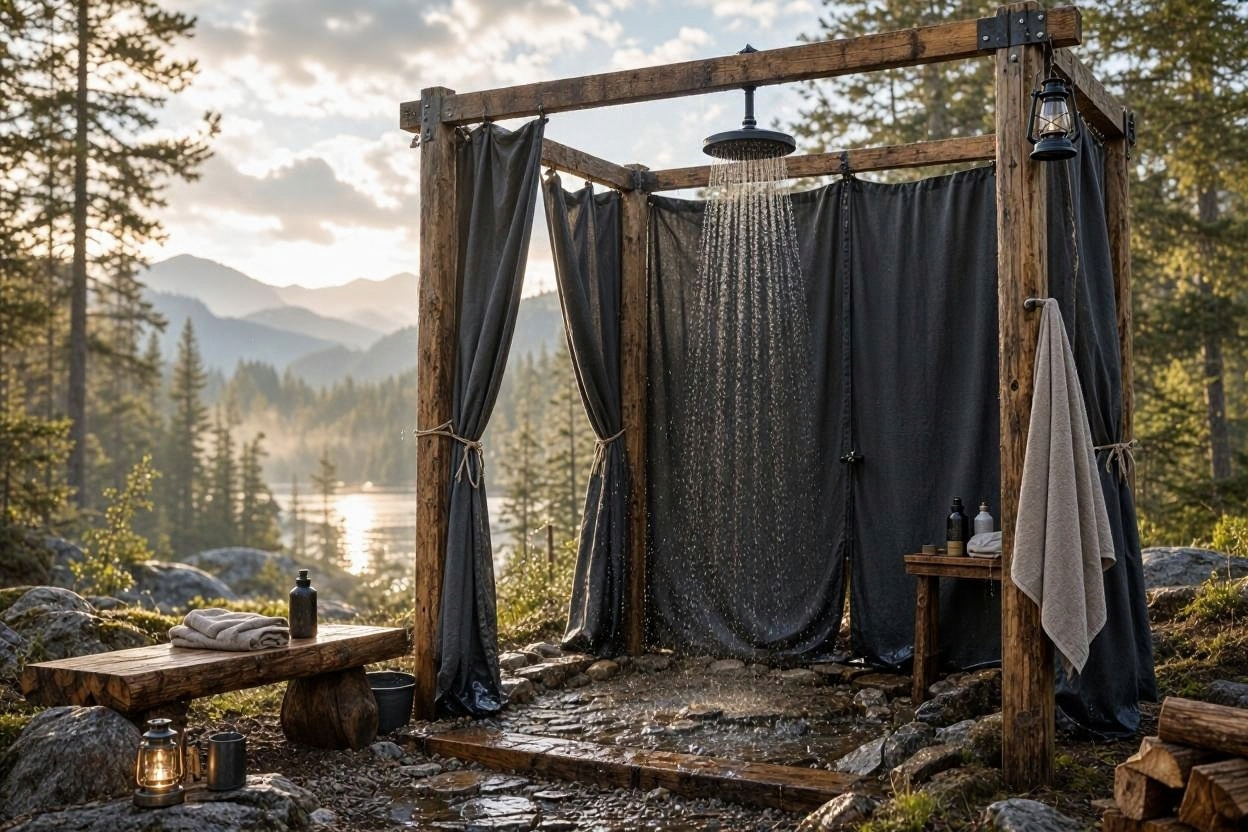
Staying clean in the wilderness doesn’t mean giving up the comforts of a refreshing shower. Whether you’re camping in the mountains, exploring remote destinations, living off-grid, or preparing for an extended outdoor adventure, a DIY wilderness shower can make life outdoors much more comfortable. From simple solar-heated bucket showers to gravity-fed systems and portable privacy enclosures, there are plenty of creative ways to build an outdoor shower using affordable supplies and materials. Explore these 25 DIY wilderness shower ideas to stay fresh wherever your adventures take you.
Bucket and Container Showers
DIY Five-Gallon Bucket Shower
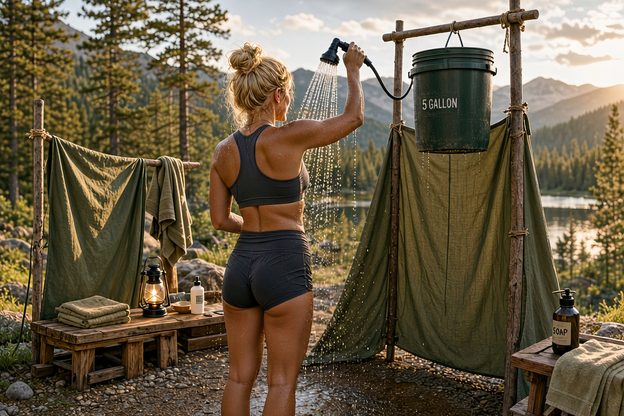
A DIY five-gallon bucket shower is an inexpensive way to enjoy a refreshing rinse while camping, hiking, or spending time in the wilderness. The bucket holds enough water for a quick shower and can be reused for multiple outdoor adventures. Add a shower nozzle or small spray attachment to control the water flow. This simple design is portable, easy to refill, and requires very few supplies.
Tools and Materials Needed:
- Five-gallon bucket with lid
- Drill and drill bit
- Threaded shower fitting
- Rubber washers
- Shower hose and spray nozzle
- Shutoff valve
- Waterproof sealant
How to Make It: Start with a clean five-gallon bucket with a secure lid. Drill a hole near the bottom of the bucket and install a threaded shower fitting with waterproof washers. Attach a shower hose or spray nozzle to the fitting. Fill the bucket with water, hang it from a sturdy support, and use a valve to control the flow.
Tips: Use a dark-colored bucket to help warm water naturally in the sunlight. Install a shutoff valve to conserve water while washing. Always test the fittings for leaks before hanging the bucket overhead.
Hanging Bucket Gravity Shower
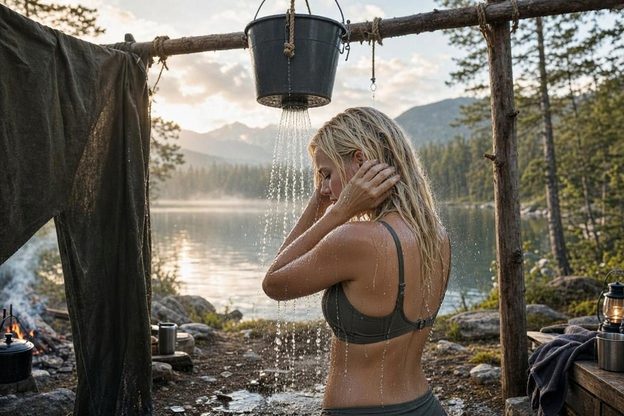
A hanging bucket gravity shower uses the natural force of gravity to deliver water without electricity, pumps, or complicated plumbing. It is an excellent option for remote campsites where access to running water is limited. You can make one using an ordinary bucket, rope, and a simple showerhead attachment. The higher you position the bucket, the more water pressure you can create.
Tools and Materials Needed:
- Heavy-duty bucket with lid
- Strong hanging strap or rope
- Showerhead attachment
- Hose
- Shutoff valve
- Drill
- Waterproof washers and fittings
How to Make It: Choose a sturdy bucket with a lid and install a shower fitting near the bottom. Attach a short hose and outdoor showerhead to the fitting. Secure strong rope or a lifting strap around the bucket handle and hang it from a sturdy tree branch or overhead support. Fill the bucket with water and open the valve to let gravity provide the shower flow.
Tips: Use a wide, secure hanging strap instead of relying on a worn plastic handle. Keep the bucket at a comfortable height for easy operation. Test the branch or support with the filled bucket before getting underneath it.
Watering Can Outdoor Shower
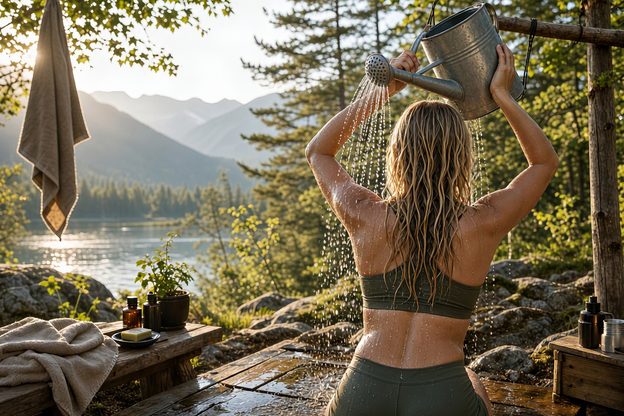
A watering can makes a surprisingly convenient DIY wilderness shower, especially for campers who want a simple, inexpensive washing solution. Its built-in sprinkler head distributes water over a wider area, making it useful for rinsing off after a long hike or outdoor activity. Choose a large watering can with a removable showerhead for easier filling and cleaning. This design is lightweight, portable, and does not require complicated modifications.
How to Make It: Purchase a large watering can with a removable sprinkler attachment. Fill it with clean water and warm it in the sun if desired. Find a sturdy overhead hook or elevated platform where you can position the can. Tilt the can carefully to allow water to flow through the sprinkler head while showering.
Tips: Choose a watering can with a large capacity and comfortable handle. Clean the sprinkler head regularly to prevent dirt and debris from blocking the openings. Avoid overheating water in direct sunlight, and test the temperature before use.
PVC Pipe Bucket Shower
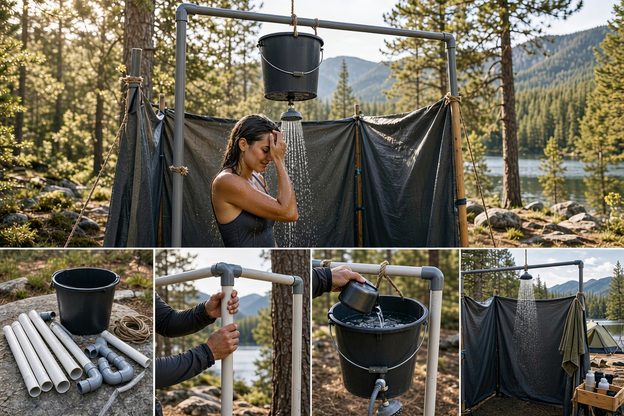
A PVC pipe bucket shower combines inexpensive plumbing supplies with a basic water container to create a convenient outdoor washing station. The PVC piping allows you to direct water through a showerhead positioned above your head. You can customize the height and design to fit a campsite, backyard, or wilderness shelter. It is a practical project for anyone who enjoys building their own outdoor equipment.
How to Make It: Start with a five-gallon bucket, PVC pipe, connectors, a valve, and a compatible showerhead. Install a watertight bulkhead fitting near the bottom of the bucket and connect it to the PVC pipe. Run the pipe vertically along a sturdy frame and attach the showerhead at the top. Fill the bucket, open the valve, and allow gravity to move water through the piping.
Tips: Use waterproof PVC-compatible fittings and seal connections properly. Secure the vertical pipe to a sturdy frame so it does not tip over. Keep the showerhead removable for easier cleaning and storage.
Recycled Water Jug Shower
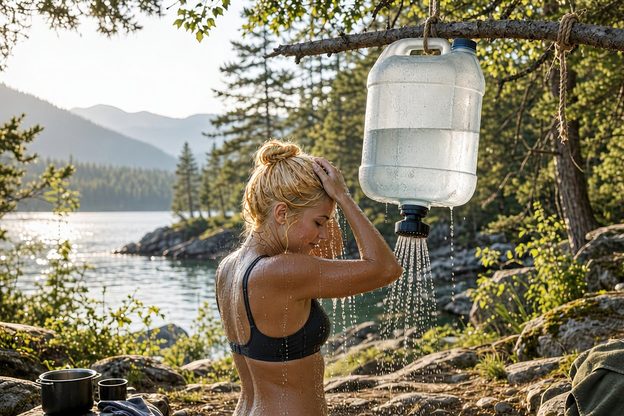
A recycled water jug shower is a budget-friendly way to reuse large plastic water containers for outdoor bathing. This design works particularly well for lightweight camping setups, emergency washing stations, and short wilderness trips. Choose a sturdy, food-grade water jug with a handle that makes carrying and hanging it easier. A small spigot or shower nozzle helps distribute water without wasting your supply.
How to Make It: Thoroughly clean a large, food-grade plastic water jug and remove any labels. Install a compatible threaded spigot or bulkhead fitting near the bottom of the container, using a rubber washer to prevent leaks. Attach a small hose and shower nozzle if desired. Fill the jug with water, position it on an elevated platform or secure support, and open the spigot when ready to shower.
Tips: Choose a thick-walled jug designed to hold water rather than a thin disposable bottle. Make sure the container has adequate ventilation so water flows smoothly. Keep a spare cap and nozzle available in case fittings become damaged during a camping trip.
Insulated Water Container Shower
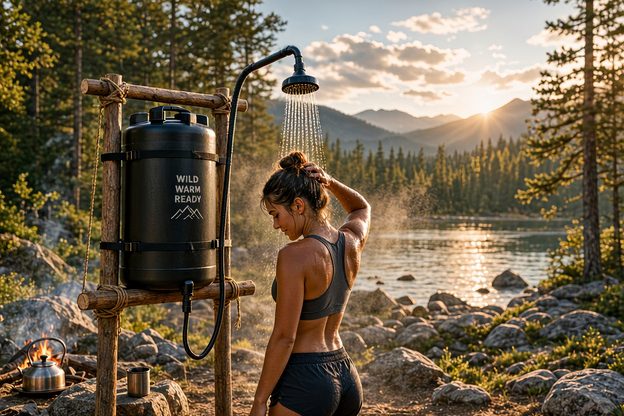
An insulated water container shower is a convenient way to enjoy warm water while camping, hiking, or spending time in remote wilderness areas. The insulated container helps maintain water temperature longer than a standard plastic bucket or jug. Choose a container with a large opening for easy filling and a secure lid to prevent dirt and debris from entering. Adding a shower hose and spray nozzle turns an ordinary insulated water container into a practical outdoor bathing station.
Tools and Materials Needed:
- Large insulated water container
- Threaded bulkhead fitting
- Rubber washers
- Shower hose
- Spray nozzle or showerhead
- Shutoff valve
- Drill
- Waterproof sealant
How to Make It: Start with a large insulated water container designed to hold liquids. Drill an appropriate hole near the bottom and install a compatible bulkhead fitting with rubber washers. Attach a shutoff valve, shower hose, and spray nozzle to the fitting. Fill the container with warm water, secure the lid, and position it on a sturdy elevated platform.
Tips: Choose a container with thick insulation to help retain heat. Check that the container material can safely hold warm water before modifying it. Test all connections for leaks before use.
Collapsible Camping Water Bag Shower
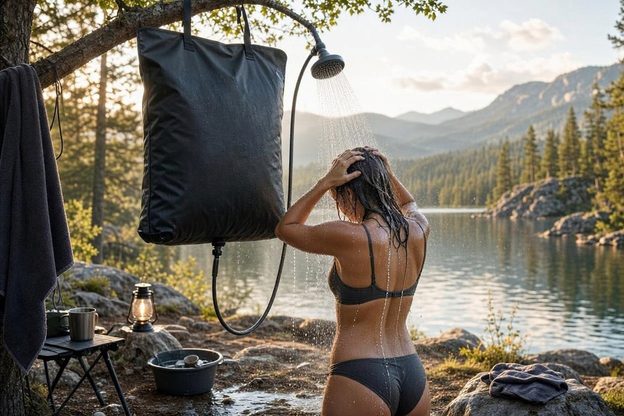
A collapsible camping water bag shower is an excellent space-saving option for backpackers, hikers, and wilderness campers. These lightweight bags can be folded flat when empty, making them easy to pack alongside other camping supplies. Many designs include a built-in shower nozzle and a hanging strap for convenient overhead use. Solar exposure can also help warm the water during the day.
Tools and Materials Needed:
- Collapsible camping water bag
- Shower nozzle or hose attachment
- Hanging strap or rope
- Sturdy overhead support
- Clean water
- Repair patches (optional)
How to Make It: Purchase a collapsible water bag designed specifically for camping showers. Fill the bag with clean water according to its capacity instructions. Close the filling cap securely and attach the shower nozzle if it is not already installed. Hang the bag from a sturdy overhead support and open the shower valve when ready to use.
Tips: Choose a model with reinforced hanging straps and a controllable shower nozzle. Avoid overfilling the bag, and inspect seams for leaks before hanging it overhead. Store it completely dry to prevent mold and mildew.
Hanging Jerry Can Shower
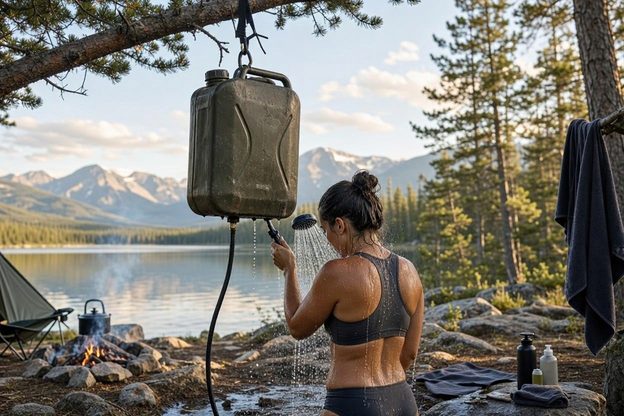
A hanging jerry can shower transforms a sturdy water container into a convenient wilderness washing station. Jerry cans are designed for transporting liquids and often feature durable handles that make them useful for outdoor adventures. A water-safe container with a shower attachment can provide a steady gravity-fed rinse without requiring electricity. This setup works well for remote campsites, hunting cabins, and off-grid shelters.
Tools and Materials Needed:
- Water-safe jerry can
- Compatible bulkhead fitting
- Rubber washers
- Shutoff valve
- Shower hose or nozzle
- Heavy-duty hanging strap
- Drill
- Waterproof sealant
How to Make It: Choose a clean, water-safe jerry can designed for drinking or washing water. Install a compatible bulkhead fitting near the bottom of the container and connect a shutoff valve. Attach a short shower hose and spray nozzle to direct the water. Secure the jerry can to a sturdy elevated support using a heavy-duty strap and fill it with water before use.
Tips: Never use a former fuel or chemical jerry can for shower water. Select a container with a secure handle and a wide filling opening. Make sure the support can safely hold the weight of the full container.
Large Storage Tote Shower

A large storage tote shower provides a creative way to build a high-capacity outdoor washing station using an inexpensive plastic storage container. Its wide opening makes filling, cleaning, and inspecting the water supply easier. You can connect a hose and showerhead to create a simple gravity-fed shower for campsites or backyard wilderness setups. A sturdy frame or platform helps keep the container elevated and stable.
Tools and Materials Needed:
- Large heavy-duty storage tote with lid
- Water-safe bulkhead fitting
- Rubber washers
- Garden hose or shower hose
- Shower nozzle
- Shutoff valve
- Drill
- Sturdy support platform
How to Make It: Choose a heavy-duty, water-safe storage tote capable of holding the weight of the water. Drill a hole near the bottom and install a compatible bulkhead fitting with rubber washers. Connect a shutoff valve, hose, and shower nozzle to the fitting. Place the tote on a level, reinforced platform that can safely support the filled container.
Tips: Use a container made from food-grade or otherwise water-safe plastic. Avoid thin storage bins that can bow or crack under the weight of water. Keep the lid covered to prevent insects, leaves, and dirt from entering.
Solar-Powered and Heated Showers
Solar-powered wilderness showers use sunlight to warm water naturally, making outdoor bathing more comfortable in remote campsites. These designs can be made with black hoses, water bags, barrels, and other materials that absorb heat from the sun. They are useful for off-grid living, extended camping trips, hunting cabins, and wilderness retreats. Depending on the design, you can create anything from a simple portable shower to a permanent outdoor bathing station.
DIY Black Hose Solar Shower
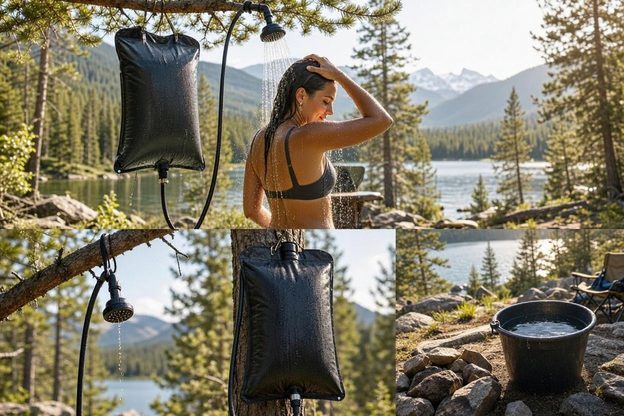
A DIY black hose solar shower uses dark-colored tubing to absorb sunlight and heat water as it moves through the hose. This simple design is ideal for summer camping and outdoor washing stations where electricity is unavailable. The hose can be arranged in coils on a sunny surface or attached to a wooden frame to maximize sun exposure. When connected to a water container and showerhead, it provides a convenient source of solar-heated water.
Tools and Materials Needed:
- Black garden hose rated for the intended water temperature
- Water container or storage tank
- Hose connectors
- Shutoff valve
- Outdoor showerhead
- Hose clamps
- Wooden board or mounting frame
- Drill and screws
How to Make It: Arrange the black hose in several large coils on a sunny wooden platform or frame. Connect one end to a water container and the other to a showerhead using compatible hose fittings. Install a shutoff valve to control the water flow. Fill the system with water and allow the hose to absorb sunlight before using the shower.
Tips: Use tubing specifically rated for hot water and drinking-water contact if appropriate. Check the water temperature before showering because black hoses can become extremely hot. Add a cold-water mixing valve to prevent scalding.
PVC Solar Heating Shower
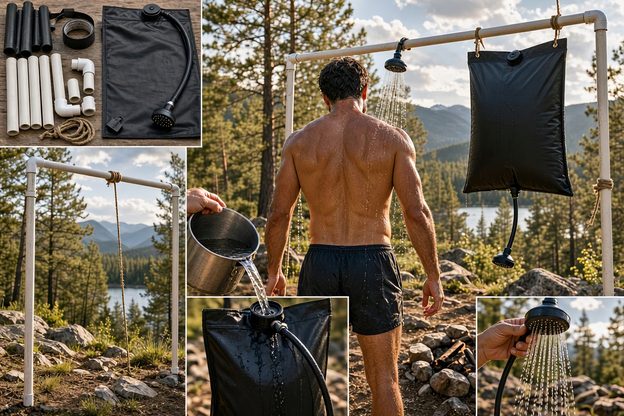
A PVC solar heating shower uses dark-colored piping and a water storage container to create a simple outdoor heating system. The pipes absorb sunlight and transfer heat to the water circulating or resting inside them. This setup can be customized for a backyard shower, remote cabin, or permanent wilderness shelter. It offers an inexpensive way to experiment with solar water heating without installing an electric water heater.
Tools and Materials Needed:
- UV-resistant, temperature-rated black piping
- Water storage container
- Compatible pipe connectors
- Shutoff valves
- Showerhead
- Hose fittings
- Support frame
- Drill and mounting hardware
How to Make It: Build a sturdy frame to support the piping in a sunny location. Arrange the dark piping in a series of connected loops and attach it to a water storage container using compatible fittings. Connect the outlet to a showerhead and install valves to control water flow. Fill the system and allow sunlight to warm the water before showering.
Tips: Do not assume ordinary PVC is suitable for hot water; select piping specifically rated for the expected temperature and use. Keep the system away from freezing conditions and inspect connections regularly. Include a temperature control or cold-water mixing valve to prevent burns.
Solar Shower Bag with Hanging Frame
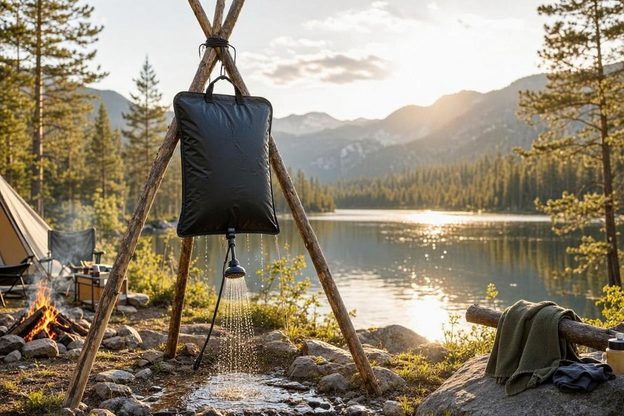
A solar shower bag with a hanging frame is a portable solution for campers who want warm water without carrying bulky equipment. The dark-colored bag absorbs sunlight throughout the day, warming the water stored inside. A simple wooden or metal frame provides a convenient place to hang the bag above the showering area. Many camping shower bags already include a hose, spray nozzle, and hanging strap.
Tools and Materials Needed:
- Solar camping shower bag
- Shower hose and spray nozzle
- Wooden or metal support frame
- Heavy-duty hanging strap
- Frame connectors or brackets
- Rope or mounting hardware
How to Make It: Purchase a solar shower bag designed for outdoor use and fill it with clean water according to the manufacturer’s instructions. Build a sturdy overhead frame using treated lumber or metal poles. Secure the frame with appropriate brackets and hang the filled bag from its support strap. Allow the bag to warm in direct sunlight and use the attached nozzle to control the water flow.
Tips: Choose a shower bag with reinforced seams and a reliable hanging strap. Make sure the frame can support the weight of the filled bag. Check the water temperature before use and avoid leaving the bag in extreme heat for extended periods.
Black Barrel Solar Shower
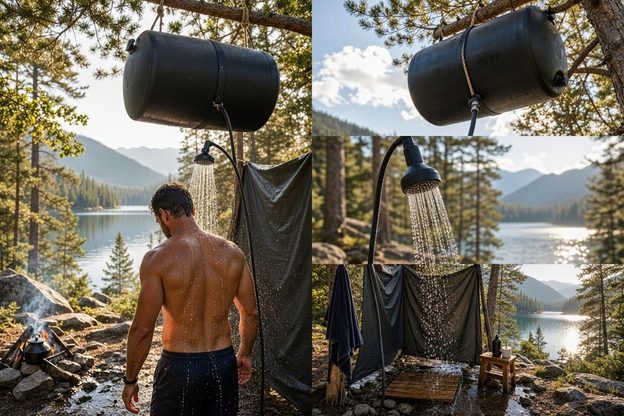
A black barrel solar shower is a larger-capacity option for wilderness cabins, off-grid properties, and extended camping locations. The dark barrel absorbs sunlight and gradually warms the water stored inside. Its larger capacity makes it useful for multiple quick showers without constant refilling. With a properly installed outlet, hose, and showerhead, the barrel becomes a practical outdoor bathing system.
Tools and Materials Needed:
- Black, UV-resistant, water-safe barrel
- Compatible bulkhead fitting
- Rubber washers
- Shutoff valve
- Shower hose and showerhead
- Sturdy elevated platform
- Temperature thermometer
- Drill
How to Make It: Select a water-safe barrel with a secure lid and enough capacity for your needs. Install a compatible bulkhead fitting near the bottom and connect a shutoff valve and shower hose. Place the barrel on a reinforced platform designed to support its full weight when filled. Position it in a sunny location and allow the water to warm naturally before showering.
Tips: Use a barrel specifically designed for water storage rather than a recycled chemical or fuel drum. Reinforce the platform because water weighs approximately 8.34 pounds per gallon. Check temperatures before use and consider a mixing valve for safer bathing.
Greenhouse Solar Shower
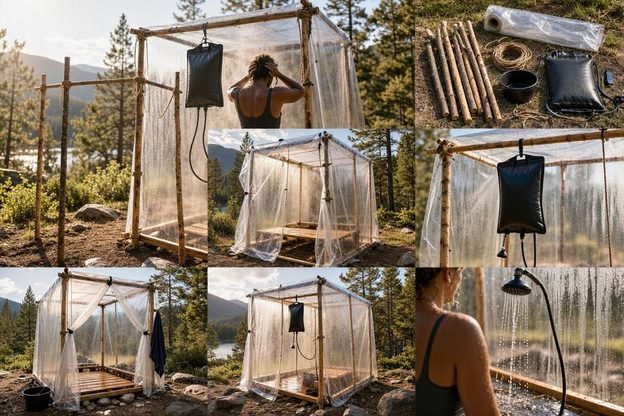
A greenhouse solar shower combines a small enclosed structure with sunlight to create a naturally warmed outdoor bathing area. The enclosure traps solar heat, helping warm both the surrounding space and the water stored inside. You can build one using greenhouse panels, a dark water container, and a basic shower fixture. This design offers more privacy and weather protection than an open-air wilderness shower.
Tools and Materials Needed:
- Greenhouse panels or UV-resistant clear sheeting
- Wooden or metal framing
- Dark water-safe storage container
- Outdoor showerhead
- Shower hose
- Shutoff valve
- Bulkhead fitting
- Waterproof flooring or drainage materials
- Screws and mounting brackets
How to Make It: Build a small enclosed shower structure using treated lumber or metal framing. Cover the walls and roof with suitable greenhouse panels or clear outdoor sheeting to allow sunlight inside. Position a dark water-safe container in a sunny location and connect it to a shower hose and showerhead using compatible fittings. Add a private entrance, secure flooring, and appropriate drainage to complete the outdoor shower.
Tips: Include ventilation openings to prevent excessive heat and condensation. Use a stable, reinforced base for the water container and make sure the enclosure has adequate privacy. Provide proper drainage and keep wastewater away from streams, lakes, and other natural water sources.
PVC Pipe and Plumbing Showers
PVC pipe showers use inexpensive plumbing materials to create customized outdoor shower systems. They can be built with overhead showerheads, freestanding frames, and gravity-fed water supplies for convenient washing at campsites or wilderness shelters. These designs are easy to customize, making them suitable for temporary camping setups, off-grid cabins, and permanent outdoor bathing areas. With the right fittings and support structures, you can build a functional shower without complicated plumbing.
Freestanding PVC Pipe Shower
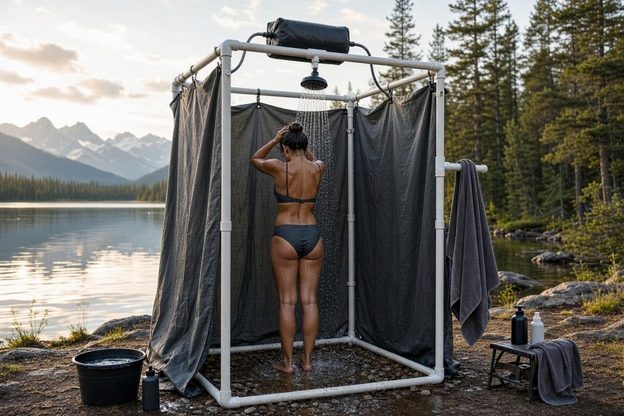
A freestanding PVC pipe shower is a simple outdoor bathing solution that does not require mounting anything to trees, walls, or existing structures. Its upright frame supports an overhead showerhead and connects to a garden hose or water storage container. This design works well for campsites, backyard retreats, and wilderness shelters. You can customize the height and width to create a comfortable showering space.
Tools and Materials Needed:
- PVC pipes rated for the intended water pressure
- PVC elbows and T-connectors
- Compatible PVC adhesive
- Outdoor showerhead
- Garden hose connector
- Shutoff valve
- PVC pipe cutter or hacksaw
- Measuring tape
- Heavy-duty base supports
How to Make It: Cut the PVC pipes to your preferred shower height and assemble a rectangular upright frame using elbows and connectors. Install a horizontal pipe across the top and attach a compatible showerhead. Add a hose connection and shutoff valve near the bottom. Secure the structure to a weighted base and connect it to a water supply.
Tips: Use a wide base to prevent the shower from tipping over. Choose pressure-rated components if connecting to a pressurized water source. Test the entire assembly before use.
DIY PVC Frame Shower
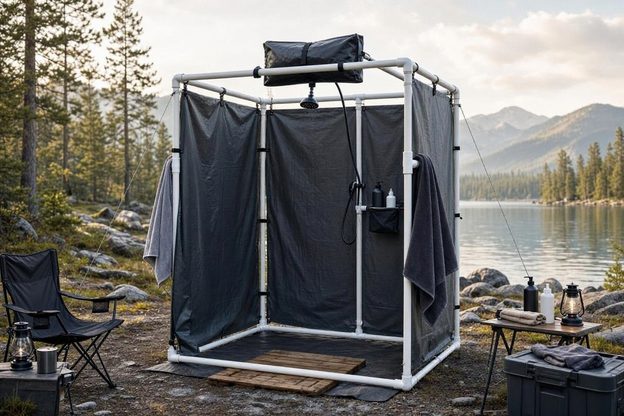
A DIY PVC frame shower creates a larger outdoor bathing area with an enclosed or partially enclosed frame for added privacy. The lightweight structure can be covered with a shower curtain, outdoor fabric, or waterproof panels. It is a practical option for campers who want a dedicated washing station without building a permanent bathroom. The frame can also be disassembled for transportation and storage.
Tools and Materials Needed:
- PVC pipes
- PVC corner connectors and T-joints
- PVC-compatible adhesive
- Outdoor shower curtain or waterproof fabric
- Showerhead and hose
- Hose connector
- Shutoff valve
- Pipe cutter
- Measuring tape
- Ground stakes or weighted supports
How to Make It: Measure and cut PVC pipes to create four vertical supports and connecting top and bottom sections. Assemble the frame using compatible connectors and secure it with ground stakes or weighted supports. Attach waterproof fabric or a shower curtain around the sides for privacy. Install a showerhead along the upper frame and connect it to a water source using a hose.
Tips: Choose UV-resistant PVC and outdoor fabric to withstand sunlight and changing weather. Leave an opening for ventilation and easy entry. Secure the frame against wind before using it.
PVC Rainfall Shower
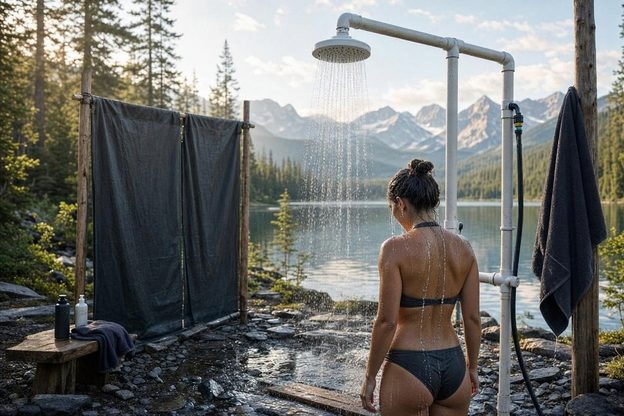
A PVC rainfall shower creates a relaxing overhead water effect using a horizontal pipe fitted with multiple small openings. Instead of a traditional showerhead, water flows through the holes to produce a gentle rainfall pattern. This design is ideal for summer campsites, outdoor retreats, and backyard bathing areas. You can adjust the pipe length and hole spacing to customize the water coverage.
Tools and Materials Needed:
- PVC pipe rated for the intended water pressure
- PVC end caps
- PVC connectors
- Drill and small drill bits
- Hose adapter
- Shutoff valve
- Water supply hose
- Support frame
- PVC-compatible adhesive
How to Make It: Cut a section of PVC pipe to the desired rainfall shower width. Drill evenly spaced small holes along the underside of the pipe and seal one end with a compatible end cap. Connect the opposite end to a water supply using a hose adapter and shutoff valve. Mount the pipe securely overhead using a sturdy frame and test the spray pattern.
Tips: Start with small holes and test the water flow before enlarging them. Use a pressure regulator when connecting to a pressurized supply. Clean the openings regularly to prevent mineral buildup and blockages.
Portable PVC Camp Shower
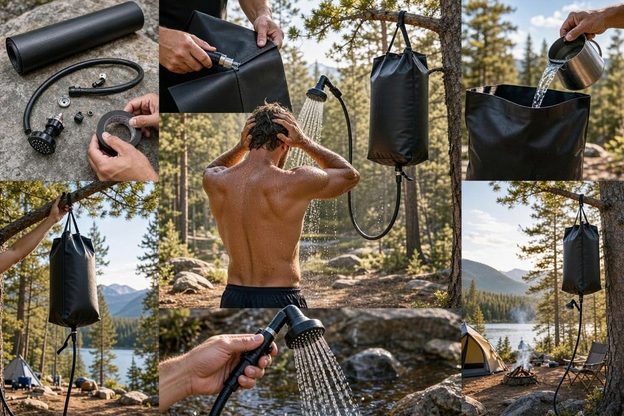
A portable PVC camp shower is designed for outdoor enthusiasts who want a lightweight washing station that can be assembled and taken apart when needed. Its simple pipe frame supports a showerhead and can connect to a portable water tank or camping water container. This setup is useful for road trips, hunting camps, fishing excursions, and extended wilderness adventures. Its modular design makes transportation and storage easier.
Tools and Materials Needed:
- PVC pipes
- Removable PVC connectors
- Showerhead attachment
- Flexible shower hose
- Water container
- Shutoff valve
- Pipe cutter
- Ground stakes
- Carrying bag
How to Make It: Cut PVC pipes into sections that fit inside your camping storage space. Assemble a lightweight rectangular frame using removable connectors and install a vertical pipe to support the showerhead. Connect the showerhead to a flexible hose and portable water container. Secure the frame with ground stakes and disassemble the sections after use.
Tips: Use removable connectors if you plan to transport the shower frequently. Keep the design compact enough to fit inside your vehicle or camping gear storage. Avoid using thin PVC components that may crack under stress.
Gravity-Fed PVC Pipe Shower
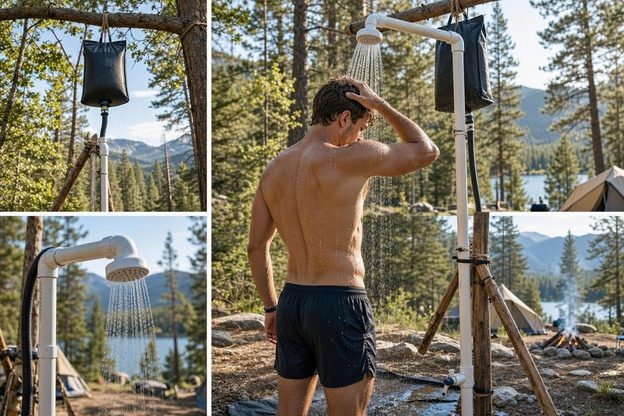
A gravity-fed PVC pipe shower uses an elevated water container to deliver water through a plumbing system without requiring an electric pump. It is particularly useful for off-grid campsites and remote wilderness shelters where electricity is unavailable. The PVC piping directs water from the container to an overhead showerhead, creating a simple bathing system. Its water pressure depends on the height of the storage container above the showerhead.
Tools and Materials Needed:
- Water-safe storage container
- PVC pipe rated for the intended application
- PVC elbows and connectors
- Compatible bulkhead fitting
- Shutoff valve
- Showerhead
- Hose adapter
- Waterproof washers
- Pipe cutter
- Elevated support platform
How to Make It: Position a water-safe storage container on a sturdy elevated platform above the shower area. Install a compatible outlet fitting near the bottom of the container and connect it to the PVC pipe system. Run the piping vertically or horizontally toward the shower area and attach an overhead showerhead. Install a shutoff valve to control water flow and test the system before use.
Tips: Elevate the water container safely and make sure the platform can support its full weight. Remember that gravity-fed systems produce relatively low water pressure, so use a showerhead designed for low-flow applications. Include a removable connection for cleaning and winter storage.
Safety Note: Use plumbing materials rated for their intended water temperature and pressure. Ordinary PVC is not suitable for every hot-water application. Never use an unsupported overhead water container, and always check the stability of your shower frame before use.
Pump and Pressurized Showers
Pump-powered wilderness showers provide stronger water flow than basic gravity-fed systems. They are useful for campers who want a more convenient shower setup without connecting to household plumbing. These designs use manual pumps, foot-operated mechanisms, garden sprayers, or rechargeable batteries to move water through a hose and showerhead. They are particularly useful for extended camping trips, hunting cabins, fishing camps, and off-grid outdoor retreats.
Hand-Pump Wilderness Shower
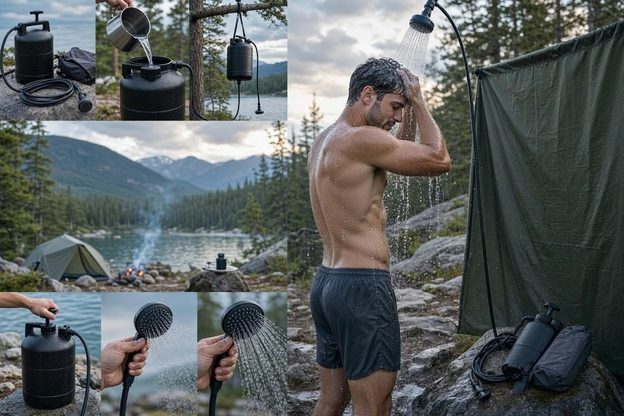
A hand-pump wilderness shower uses manual pressure to move water from a storage container through a shower hose and spray nozzle. It is a simple solution for remote campsites where electricity and running water are unavailable. Many designs can be made using a portable water tank and a hand-operated pump. The setup allows campers to control water pressure while conserving their available supply.
Tools and Materials Needed:
- Water storage container with secure lid
- Hand-operated water pump
- Compatible pressure-rated hose
- Showerhead or spray nozzle
- Shutoff valve
- Pressure-rated fittings
- Rubber washers
- Drill and appropriate hole saw
How to Make It: Start with a water-safe container large enough to hold your shower water. Install compatible inlet and outlet fittings and connect the hand pump according to its manufacturer’s instructions. Attach a pressure-rated hose and shower nozzle to the outlet. Pump the system as directed to build pressure and operate the shower.
Tips: Choose a pump designed for water rather than chemicals or fuel. Use a pressure-rated container and fittings, and never exceed the manufacturer’s pressure limits. Release pressure before opening the container for refilling.
Foot-Pump Camping Shower
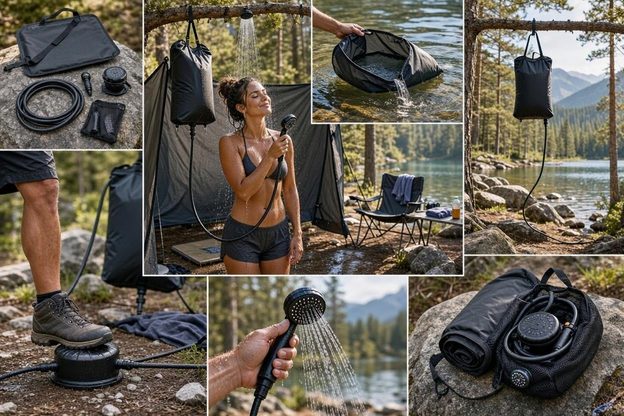
A foot-pump camping shower allows you to generate water pressure by stepping on a manual pump instead of operating a hand lever. This hands-free design is convenient for outdoor bathing because you can control the water flow while showering. It typically uses a flexible water bag or container connected to a foot-operated pump and spray nozzle. Its compact design makes it suitable for backpacking, beach trips, and wilderness camping.
Tools and Materials Needed:
- Portable water container or shower bag
- Foot-operated water pump
- Flexible water hose
- Shower nozzle
- Hose connectors
- Non-slip pump base
- Shutoff valve
- Waterproof storage bag
How to Make It: Select a foot-operated pump designed for transferring water. Connect the pump inlet to a water-safe container using compatible tubing. Attach the outlet hose and shower nozzle, making sure all connections are secure. Place the pump on a stable, non-slip surface and operate it with your foot to move water through the showerhead.
Tips: Choose a pump with adjustable water flow for better water conservation. Keep the pump on level ground and check hoses for kinks. Clean and dry the equipment after each camping trip.
Garden Sprayer Outdoor Shower
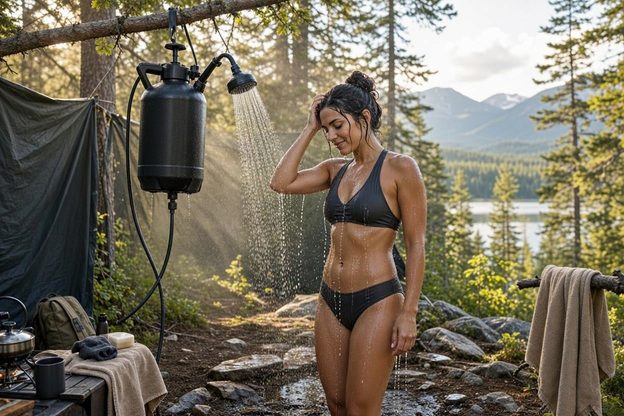
A garden sprayer outdoor shower repurposes a manual pump sprayer into a convenient portable washing system. Its built-in pressure mechanism allows water to flow through a hose and adjustable spray wand. This design is useful for rinsing off after hiking, fishing, swimming, or working outdoors. Choose a brand-new sprayer specifically rated for clean water rather than reusing equipment that has contained pesticides or other chemicals.
Tools and Materials Needed:
- New water-safe pump sprayer
- Compatible spray hose
- Shower spray nozzle
- Shutoff trigger
- Adjustable spray wand
- Clean water
- Replacement seals if needed
How to Make It: Purchase a new pump sprayer designed for clean water and inspect its seals and fittings. Fill the tank with clean water according to the manufacturer’s instructions. Adjust or replace the spray attachment with a compatible shower-style nozzle if the manufacturer permits it. Pump the handle to build pressure and use the trigger to control the water flow.
Tips: Select a sprayer with a wide spray pattern for comfortable bathing. Never use a container that previously held herbicides, pesticides, or cleaning chemicals. Release pressure according to the manufacturer’s instructions before opening the tank.
Bicycle Pump Pressurized Shower
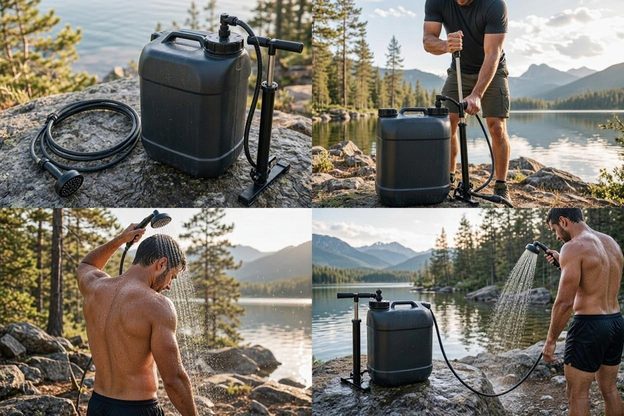
A bicycle pump pressurized shower is a creative DIY concept that uses a manual air pump to pressurize a dedicated water system. It can provide a portable shower solution for off-grid camping when built with equipment specifically designed for compressed-air operation. The system uses stored air pressure to push water through a hose and showerhead. This design requires more careful construction than ordinary gravity-fed or manual pump showers.
Tools and Materials Needed:
- Manufacturer-rated compressed-air water tank
- Compatible bicycle-style air pump
- Pressure-rated air inlet fitting
- Pressure-rated water outlet
- Shower hose
- Shower nozzle
- Pressure gauge
- Pressure relief valve
- Compatible seals and fittings
How to Make It: Use a commercially manufactured pressure-rated water tank designed for compressed-air operation. Connect a compatible air pump to the designated air inlet and install the manufacturer’s specified water outlet assembly. Attach the shower hose and nozzle to the water outlet. Follow the tank manufacturer’s instructions for filling, pressurizing, and releasing pressure before operating the shower.
Tips: Never convert an ordinary water jug, bucket, or storage container into a compressed-air pressure vessel. Use only certified equipment with a pressure gauge and relief valve. Never exceed the manufacturer’s maximum working pressure.
Battery-Powered Portable Shower
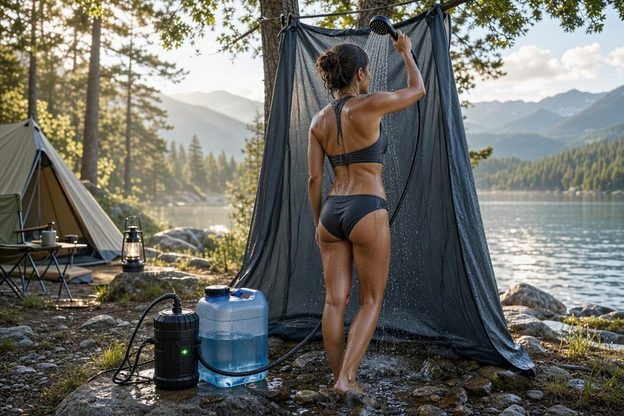
A battery-powered portable shower uses a rechargeable electric pump to move water from a bucket, jug, or camping water container through a flexible hose. It is one of the easiest ways to enjoy a more traditional shower experience while camping. Many models include rechargeable batteries, adjustable spray settings, and compact showerheads. This design is particularly useful for road trips, fishing adventures, beach camping, and off-grid cabins.
Tools and Materials Needed:
- Rechargeable portable camping shower pump
- Compatible rechargeable battery
- Flexible shower hose
- Showerhead attachment
- Water storage container
- USB charging cable
- Waterproof storage bag
- Water-safe fittings if needed
How to Make It: Purchase a rechargeable camping shower pump with an attached hose and showerhead. Place the pump intake into a bucket or water container filled with clean water. Connect the showerhead and check that the battery is charged. Switch on the pump and adjust the spray setting to control the water flow.
Tips: Choose a rechargeable model with a waterproof rating suitable for outdoor use. Keep charging connections and power banks away from water. Carry a spare battery or charging source for extended camping trips, and clean the pump filter regularly.
Natural and Rustic Wilderness Showers
Natural and rustic wilderness showers combine simple construction materials with outdoor surroundings. Bamboo, wood, trees, and other natural elements can create a private bathing area that blends into a campsite or off-grid property. These designs are ideal for remote cabins, wooded campsites, homesteads, and outdoor retreats. Always use a portable water supply and follow local rules for wastewater disposal.
Bamboo Outdoor Shower
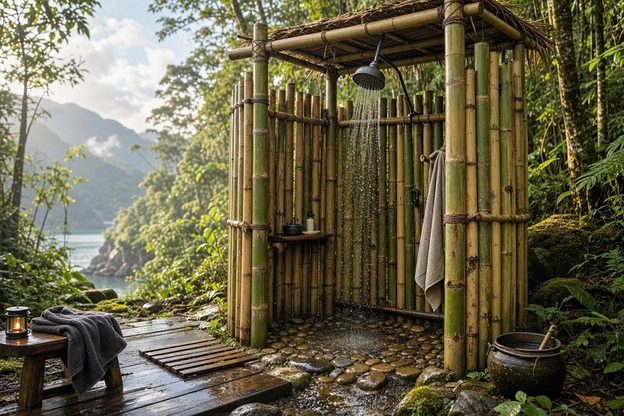
A bamboo outdoor shower creates a tropical, rustic bathing area using natural bamboo poles and simple plumbing materials. Its lightweight construction makes it a creative option for wilderness campsites, backyard retreats, and off-grid cabins. Bamboo can be used to build privacy walls, overhead supports, and decorative shower frames. Pair the structure with a portable water container and showerhead to create a functional outdoor bathing station.
Tools and Materials Needed:
- Bamboo poles
- Bamboo connectors or heavy-duty rope
- Waterproof shower curtain or privacy screening
- Outdoor showerhead
- Water hose
- Water storage container
- Shutoff valve
- Drill and screws
- Ground stakes
How to Make It: Select a level location and cut bamboo poles to the desired height. Build a rectangular frame using rope, brackets, or suitable fasteners to secure the poles together. Add bamboo screening around the sides for privacy and install an overhead shower support. Connect a showerhead to a portable water container or hose supply and secure the structure to the ground.
Tips: Choose thick, mature bamboo poles for better structural support. Treat or seal the bamboo to help protect it from moisture and insects. Keep the shower floor slip-resistant and provide adequate drainage.
Wooden Frame Rain Shower
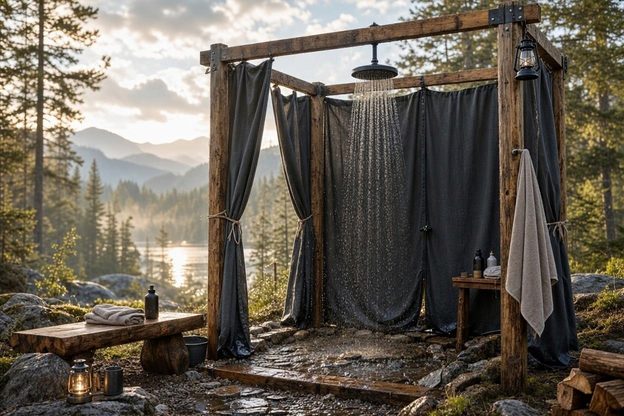
A wooden frame rain shower uses natural lumber to create a sturdy outdoor shower with an overhead rainfall-style showerhead. It is a good choice for campers and property owners who want a more permanent rustic bathing area. The wooden structure can support privacy panels, hooks, and simple outdoor shower accessories. With a portable water tank or garden hose connection, it can become a comfortable washing station.
Tools and Materials Needed:
- Pressure-treated lumber
- Exterior-grade screws
- Wooden support posts
- Outdoor rainfall showerhead
- Shower hose
- Plumbing connectors
- Shutoff valve
- Drill and screwdriver
- Measuring tape
- Level
- Concrete post supports or ground anchors
How to Make It: Build a rectangular wooden frame using sturdy support posts and horizontal crosspieces. Secure the posts with appropriate ground anchors or concrete footings. Install a horizontal support beam at the top and attach a compatible rainfall showerhead. Connect the showerhead to a water supply using an outdoor-rated hose and plumbing fittings.
Tips: Use rot-resistant or properly treated lumber designed for outdoor exposure. Seal exposed wood surfaces and inspect fasteners regularly. Make sure the overhead beam is strong enough to support the shower fixture.
Tree-Mounted Wilderness Shower
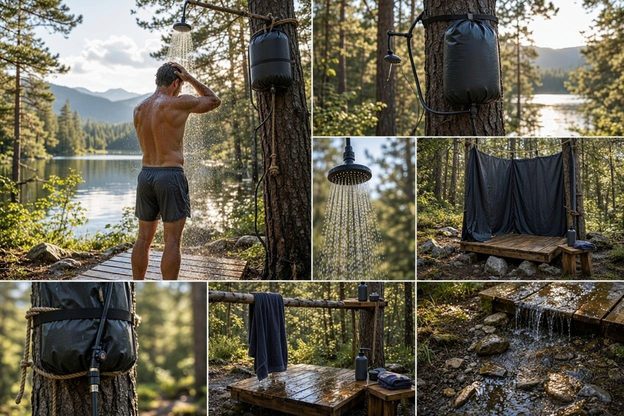
A tree-mounted wilderness shower uses an existing sturdy tree as a natural support for a portable showerhead or water container. This design is especially useful for temporary campsites where building a freestanding structure is unnecessary. A hanging shower bag or hose attachment can provide a simple bathing station surrounded by natural scenery. Protective straps help secure the equipment without damaging the tree.
Tools and Materials Needed:
- Portable camping shower bag or water container
- Outdoor showerhead
- Flexible shower hose
- Wide tree-protection strap
- Hanging strap or rope
- Shutoff valve
- Shower curtain for privacy (optional)
How to Make It: Find a healthy, sturdy tree with a suitable overhead branch or secure mounting point. Wrap a wide protective strap around the trunk or branch and attach a compatible shower support. Hang a filled camping shower bag or connect a portable water supply to the showerhead. Test the support and water flow before using the shower.
Tips: Never drive nails or screws into a living tree to mount shower equipment. Avoid hanging heavy water containers from weak or damaged branches. Use a privacy screen and keep soapy wastewater away from waterways.
Waterfall-Style Natural Shower
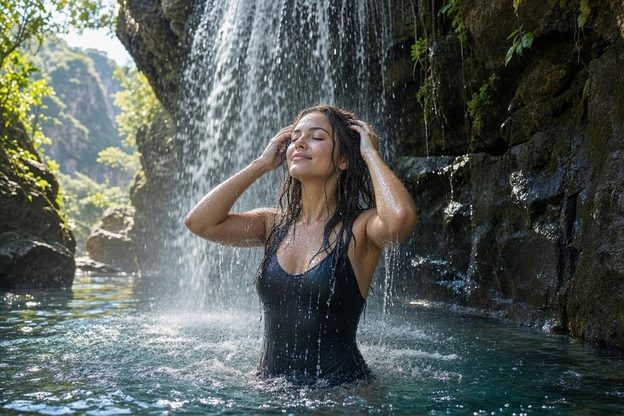
A waterfall-style natural shower recreates the relaxing experience of standing beneath a waterfall using a simple overhead water outlet. Rather than relying on an actual stream or waterfall, this design uses a water container, hose, and wide shower outlet to create a cascading flow. Natural stone, wood, and surrounding plants can help create a rustic outdoor bathing atmosphere. It works particularly well for secluded cabins, wooded properties, and wilderness retreats.
Tools and Materials Needed:
- Water-safe storage container
- Wide rainfall showerhead or waterfall outlet
- Water hose
- Shutoff valve
- Plumbing connectors
- Wooden or metal support frame
- Natural stone or decorative landscaping materials
- Drill and mounting hardware
How to Make It: Build a sturdy overhead frame using treated wood or metal supports. Attach a wide rainfall showerhead or compatible waterfall-style outlet to the upper support. Connect the fixture to a portable water container or gravity-fed water supply using suitable plumbing fittings. Add natural stone or decorative wood around the shower area to create a rustic setting.
Tips: Use a low-flow shower outlet to conserve water. Make sure stones and flooring are stable and slip-resistant. Keep the shower water supply separate from natural streams and waterfalls.
Creekside Gravity Shower
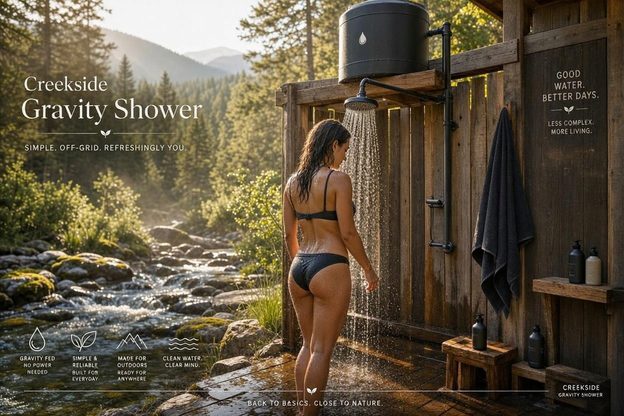
A creekside gravity shower provides a rustic outdoor bathing experience near a natural setting without using creek water directly. The system relies on an elevated portable water container to deliver water through a hose and showerhead. It is useful for remote campsites where campers want a convenient washing station surrounded by woodland or mountain scenery. A simple wooden frame or portable shower stand can provide support and privacy.
Tools and Materials Needed:
- Water-safe storage container
- Portable shower hose
- Low-pressure showerhead
- Shutoff valve
- Bulkhead fitting
- Wooden support frame
- Rope or hanging straps
- Privacy screen
- Waterproof ground mat
How to Make It: Select a campsite location that complies with local setback and environmental regulations. Position a clean water container on a sturdy elevated platform away from the creek. Connect a bulkhead fitting, shutoff valve, and shower hose to the container. Attach a low-pressure showerhead and build a simple privacy screen using wood, fabric, or portable panels.
Tips: Never draw untreated creek water for bathing if its quality is unknown. Keep soap and wastewater at least 200 feet from natural water sources where required, and follow stricter local regulations when applicable. Use biodegradable soap sparingly and disperse wastewater over suitable soil rather than allowing it to flow into the creek.
Conclusion
A wilderness shower is a simple way to bring a little comfort to outdoor living without relying on electricity, plumbing, or expensive equipment. Whether you build a basic bucket shower, create a solar-heated system, or construct a more permanent off-grid washing station, the right setup depends on your location, available water, and camping needs. With a little creativity and preparation, you can enjoy a refreshing outdoor shower almost anywhere.
Frequently Asked Questions
How do you make a wilderness shower without running water?
You can make a wilderness shower using a water container, gravity-fed hose, and showerhead attachment. Hang the container above your head, fill it with water, and use a valve to control the flow.
How do you heat water for an outdoor wilderness shower?
Solar shower bags, black water containers, and solar water-heating systems can warm water naturally. You can also heat water separately over a camp stove or fire and carefully mix it with cooler water.
How much water do you need for a wilderness shower?
A quick wilderness shower typically requires about 1–3 gallons of water, depending on the showerhead, water pressure, and length of the shower.
How do you get privacy when showering in the wilderness?
You can create privacy with a portable shower tent, tarp enclosure, outdoor privacy screen, or a simple frame covered with fabric.
Can you take a hot shower while camping?
Yes! Solar shower bags, propane-powered camping water heaters, and manually heated water can provide warm showers while camping.
How do you dispose of wilderness shower water?
Use biodegradable soap sparingly and follow local regulations. Disperse wastewater according to Leave No Trace guidance, away from lakes, streams, and other natural water sources. Never dump soapy water directly into waterways.
What is the cheapest way to make a DIY camping shower?
A bucket shower is one of the cheapest options. Use a clean water bucket, a hose or shower nozzle, and a simple hanging system to create an inexpensive outdoor shower.