Making handmade pottery without a pottery wheel is a fun and creative way to explore ceramics at home. Using simple hand-building techniques, you can shape clay into beautiful bowls, mugs, plates, vases, and decorative pieces without investing in an expensive wheel. Whether you’re a beginner or an experienced crafter, you can create unique pottery using a few basic tools, the right clay, and a little practice.
- Shop for Pottery Tools Online at Amazon
- Step 1: Gather Your Supplies
- Step 2: Prepare the Clay
- Step 3: Choose a Hand-Building Technique
- Step 4: Shape Your Pottery
- Step 5: Add Decorative Details
- Step 6: Smooth the Surface
- Step 7: Let the Clay Dry
- Step 8: Fire the Pottery
- Step 9: Glaze and Finish
- Conclusion
- Frequently Asked Questions
Shop for Pottery Tools Online at Amazon
Step 1: Gather Your Supplies
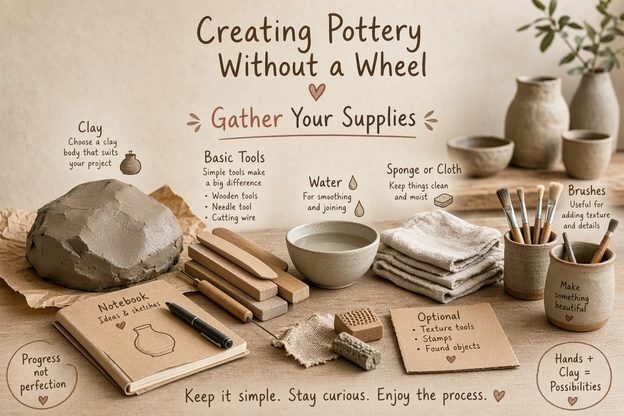
Before making handmade pottery, gather all the materials and tools needed to shape, smooth, and decorate your clay. Choose air-dry clay for simple home projects or ceramic clay if you plan to have your pottery kiln-fired. Set up a clean, flat work surface with enough room to roll, cut, and shape your clay. Having all your supplies ready will make the pottery-making process easier and more enjoyable.
Tools and Supplies Needed:
- Pottery clay (air-dry or ceramic)
- Wooden or silicone rolling pin
- Pottery sculpting and carving tools
- Clay cutting wire or craft knife
- Small sponge
- Small bowl of water
- Smooth work surface or pottery board
- Cookie cutters (optional)
- Texture stamps (optional)
- Wooden modeling tools (optional)
Step 2: Prepare the Clay
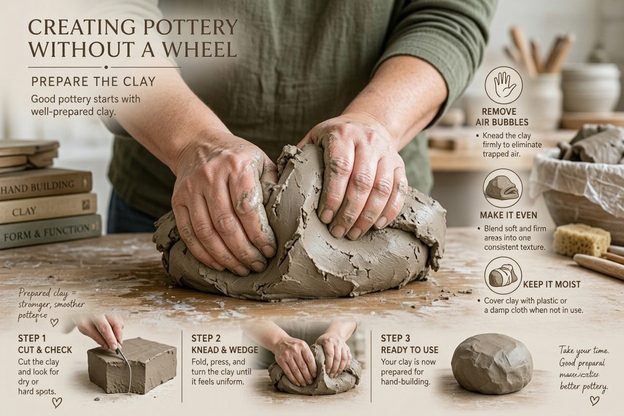
Start by cutting off a manageable piece of pottery clay and placing it on a clean work surface or pottery board. Knead the clay firmly with your hands, pressing, folding, and turning it repeatedly to soften the material and remove trapped air pockets. This process is called wedging and helps create an even consistency that is easier to shape. If the clay feels too stiff, follow the manufacturer’s instructions for adding a small amount of water. Once the clay is soft, smooth, and pliable, it is ready for hand-building.
Tools and Supplies Needed:
- Pottery clay
- Clay cutting wire
- Smooth work surface or pottery board
- Small bowl of water
- Damp sponge
- Rolling pin (optional)
- Plastic clay scraper
- Airtight plastic bag or clay storage container
Step 3: Choose a Hand-Building Technique
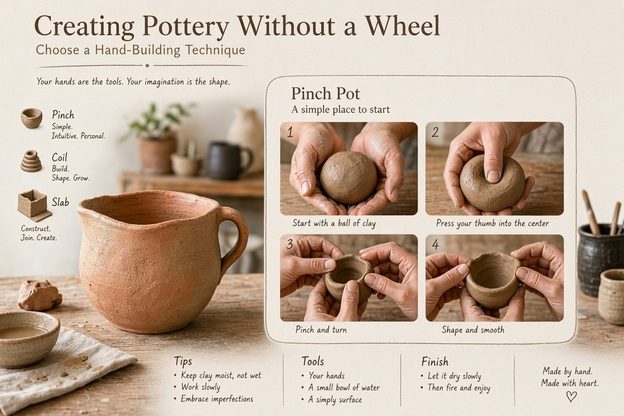
Choose a hand-building technique based on the type of pottery you want to create, such as bowls, mugs, vases, plates, or decorative containers. Hand-building allows you to shape pottery entirely by hand without purchasing or using a pottery wheel. Three popular techniques include pinch pots, coil building, and slab building, each offering a different way to form and construct clay pieces. Beginners often find pinch pots the easiest technique, while coil and slab building allow you to create larger and more detailed designs.
Three Hand-Building Techniques:
– Pinch Pot: Roll a piece of clay into a ball and press your thumb into the center to create an opening. Slowly pinch the walls while rotating the clay to form a bowl, cup, or small decorative pot.
– Coil Building: Roll clay into long, even ropes and arrange them in circular layers to build the walls of your pottery. Press the coils together and smooth the seams to create bowls, vases, planters, and storage containers.
– Slab Building: Use a rolling pin to flatten clay into an even sheet, then cut out shapes using a craft knife or clay cutter. Join the pieces together using scoring and slip to create mugs, plates, boxes, trays, and square or rectangular containers.
Tools and Supplies Needed:
- Pottery clay
- Rolling pin
- Clay cutting wire
- Pottery sculpting tools
- Craft knife or clay cutter
- Wooden modeling tools
- Clay scoring tool
- Small bowl of water
- Clay slip (liquid clay mixture)
- Ruler or measuring guide
- Cookie cutters (optional)
Step 4: Shape Your Pottery
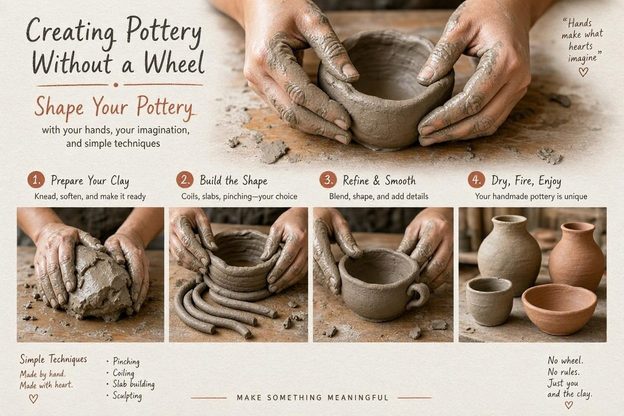
Once you have formed the basic structure, begin shaping your pottery into its final design. Use your hands, fingers, and pottery sculpting tools to adjust the height, width, curves, and thickness of the clay. Gently press and smooth the sides to create an even shape, making sure the walls are not too thin or too thick. Pay attention to the bottom and edges to ensure your pottery sits evenly on a flat surface. Take your time making adjustments before the clay begins to dry.
Step 5: Add Decorative Details
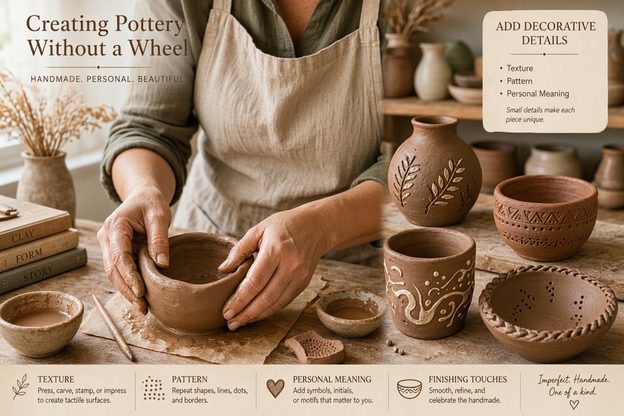
Add decorative elements while the clay is still soft and flexible. Use carving tools, stamps, wooden modeling tools, or household objects to create floral patterns, geometric designs, raised textures, and decorative borders. You can also attach clay handles, small flowers, sculpted leaves, or other decorative pieces using scoring and slip to help them adhere. Experiment with different textures and patterns to give your pottery a unique handmade appearance.
Step 6: Smooth the Surface
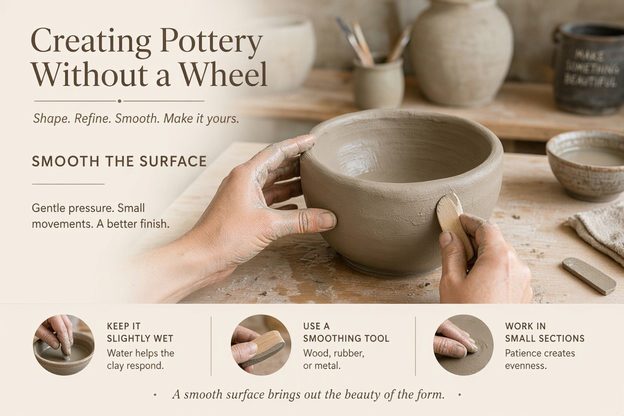
After shaping and decorating your pottery, use a damp sponge or your fingertips to smooth rough areas and blend visible seams. Gently work around the edges, handles, and joints to create a clean, finished appearance. Remove excess clay and smooth out fingerprints or unwanted marks before the piece begins drying. Avoid adding too much water, as this can weaken the clay and make it difficult to maintain its shape.
Step 7: Let the Clay Dry
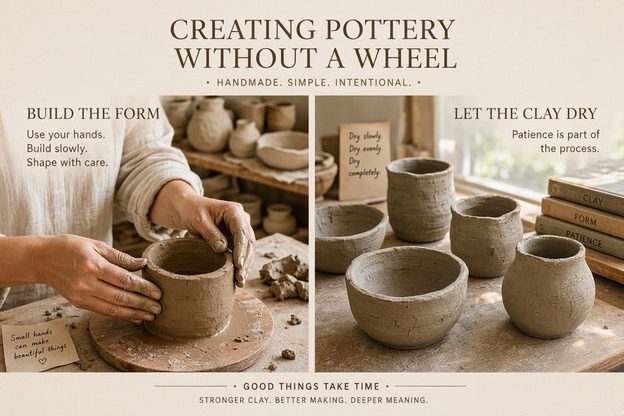
Place your finished pottery on a flat, protected surface and allow it to dry slowly and evenly. Air-dry clay generally takes 24–72 hours or longer, depending on the thickness of the piece and the manufacturer’s instructions. Traditional ceramic clay must become completely dry, reaching a stage called bone dry, before it is ready for kiln firing. Avoid placing your pottery in direct sunlight or near heaters, as rapid drying can cause cracks and warping.
Step 8: Fire the Pottery
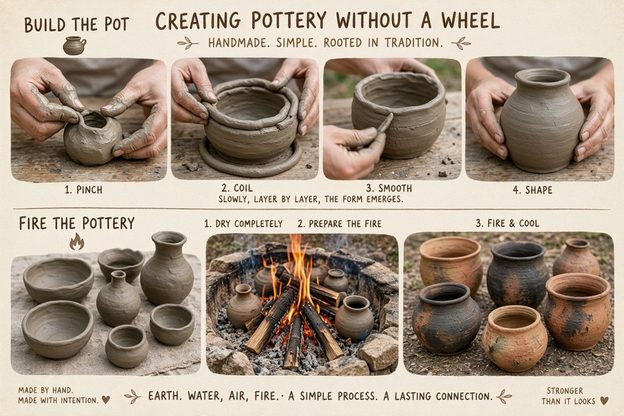
If you used traditional ceramic clay, your completely dried pottery must be fired in a pottery kiln to become durable. Contact a local pottery studio, community art center, or kiln service to arrange the first firing, commonly called bisque firing. The firing temperature depends on the type of clay you selected, so make sure the studio knows which clay you used. Air-dry clay does not require kiln firing and should not be placed in a kiln unless the manufacturer specifically approves it.
Step 9: Glaze and Finish
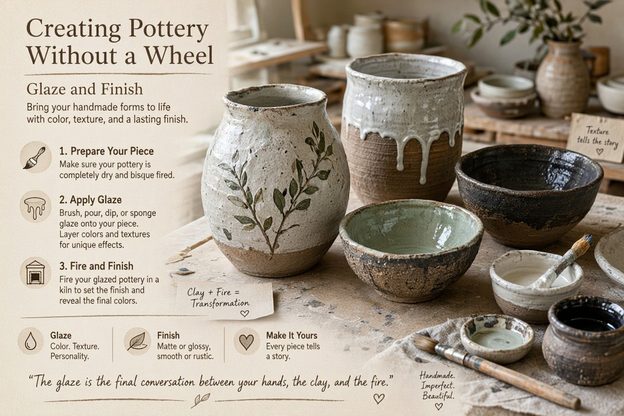
Once your ceramic pottery has completed its first firing, you can decorate it with ceramic glaze to add color, shine, and a protective finish. Apply the glaze using a paintbrush, dipping technique, or sponge, following the manufacturer’s instructions for coverage and drying time. Have the pottery fired a second time at the appropriate temperature to set the glaze and complete the finishing process. For air-dry clay, use acrylic paints and a compatible protective sealer instead of ceramic glaze. Your handmade pottery is now ready to display, or use for food and beverages if it has been properly fired and finished for that purpose.
Conclusion
You don’t need a pottery wheel to make beautiful handmade ceramics. Techniques such as pinch pots, coil building, and slab building make it possible to create a variety of pottery projects right at home. Start with simple designs, experiment with different shapes and textures, and develop your own style as you gain experience.
Frequently Asked Questions
1. Can you make pottery without a pottery wheel?
Yes! You can make pottery by hand using pinch pot, coil, and slab-building techniques. These methods are beginner-friendly and don’t require a pottery wheel.
2. What kind of clay is best for making pottery at home?
Air-dry clay is convenient for decorative projects. For functional pottery, use ceramic clay that can be fired in a kiln.
3. What tools do you need to make pottery without a wheel?
Basic supplies include clay, a rolling pin, pottery knife, clay modeling tools, a sponge, a needle tool, and a smooth work surface.
4. Can you make mugs and bowls without a pottery wheel?
Yes! You can hand-build mugs and bowls using pinch pot or slab-building techniques. Add handles, textures, and decorative details to personalize each piece.
5. Does handmade pottery need to be fired?
Ceramic clay needs to be kiln-fired to become durable and suitable for functional use. Air-dry clay does not require a kiln, but it is generally intended for decorative projects.